Pages

Showing posts with label Sewing. Show all posts

Tuesday, April 3, 2018

Easter Bunnies

Fabric Easter Bunnies


When you have left over fabrics - what to do? I had some scraps left over from a project and since it was Easter sewed these adorable bunnies and stuffed them to make it soft and cuddly.


Thursday, December 14, 2017

Weather worm for the door-draft - Recycled jeans!

With the beginning of winter we have a few drafty doors. I decided to make use of he old worn-out jeans I saved for projects and make a weather worm to stop the drafts.


I used the pant legs. I needed at least 40 inches and luckily I am tall so they made it to 42 inches.


Because of the shape of the pants I was not able to cut them into perfect rectangles as I needed most of the length.


I separated the legs and cut the backside loose from the rest. I removed the belt loops and opened the bottom seams and them I cut the legs into as straight of a rectangle as possible.
 

I sewed the jeans into a tube (right sides together ), turned them inside out and then sewed another line about 1 inch from the seam for the rice. I sewed the one side closes and started to full th little tube with rice using a funnel.
 

I was a little difficult to get the rice all the way down, there may an easier way but I will have to explore ways to find out. For now, this works. After the rice tube was filled, I stuffed the body with scrap fabrics and old re-cycled cut-up t-shirts that has seen better days. ( I believe in no wastage )


The rice weighs it down to keep the worm right there in front of the door were he is supposed to be. After stuffing the worm, I sewed the top end closed to keep the stuffing and rice in.
Good use of old jeans to keep the draft out and the warm air inside.

Tuesday, December 30, 2014

Upfashioned tablecloth skirt

My Tablecloth Skirt
 
 
I found this tablecloth on a yardsale a few weeks ago & could see it as a DIY skirt. The lace & embroidery fabric screamed "skirt"!!
It is easy to up-fashion a round tablecloth as all you need is to cut a hole & add ribbing.
 
 
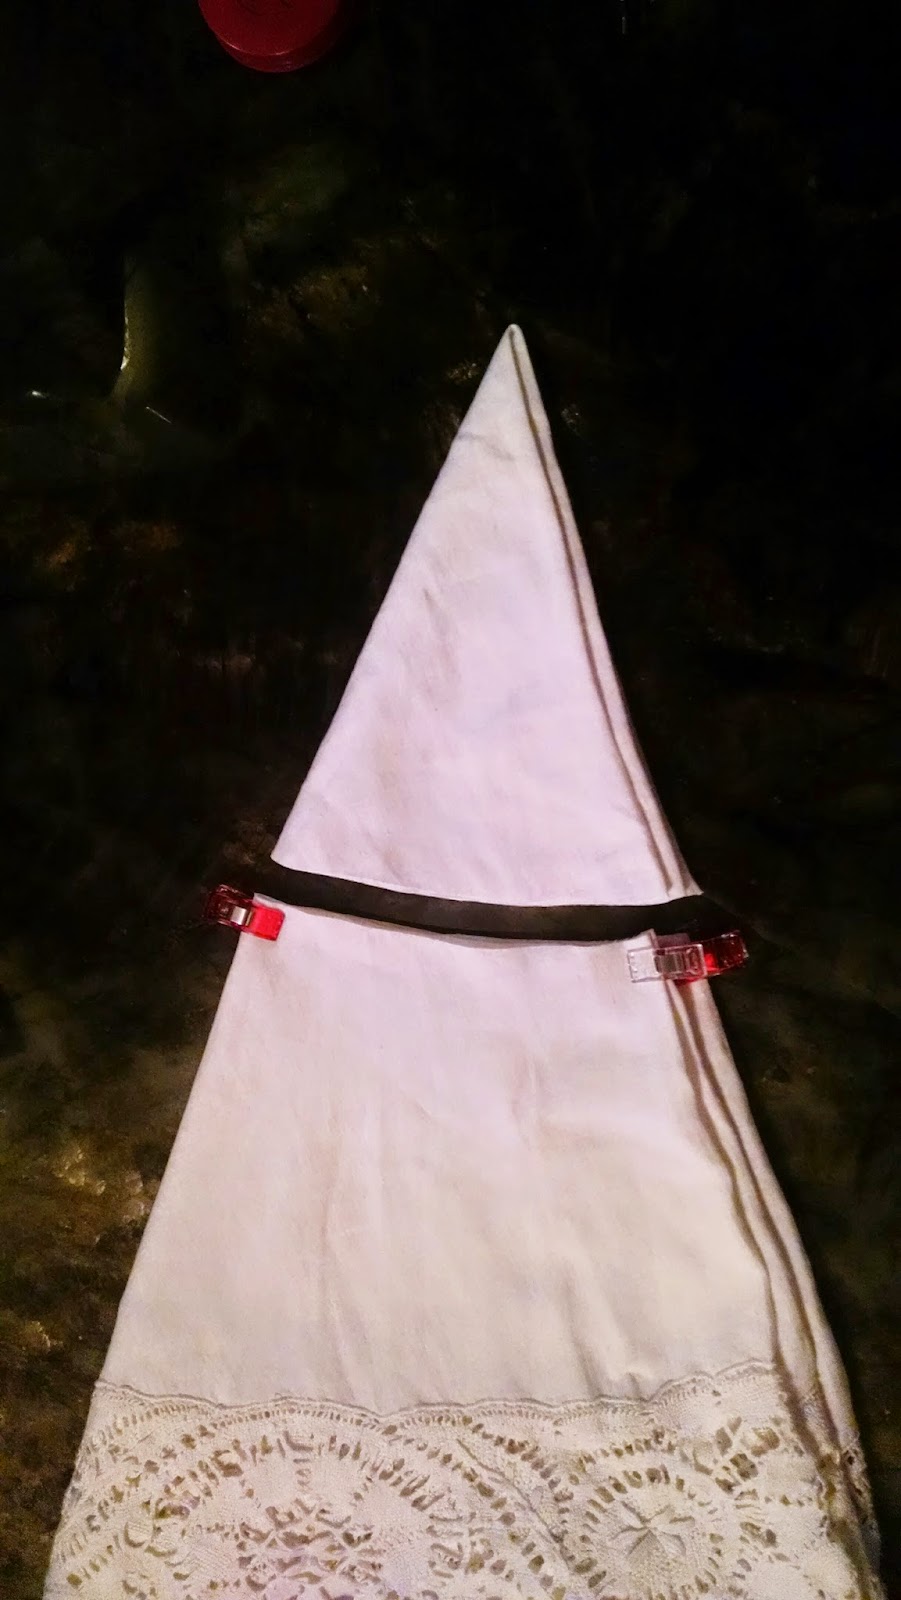
 Ribbing is found at most fabric stores I had this piece left over fro a previous project and it was just long enough to add the desired length to my skirt. The width was also perfect, so I did not have to seam the ribbing. I just folded it over to double for the top half of the skirt

 
I measured my hips & folded the tablecloth in 4, took the 1/4 measurement of my hips & cut the fabric curved to follow the tape.

 
I attached the ribbing to the cut edge of the tablecloth & serged the inside edge.

 
I will be wearing a short petticoat with this skirt.
 

Tuesday, October 21, 2014

Mad Hatter Upcycle

MAD HATTER COSTUME 
 

This is what became the Mad Hatter costume
 
Purple jacket $3.49.

 
Lace & fabric for collar & cuffs, free. (I have lots of scrap fabrics)


The sash/bobbin belt will be made from all the old wooden spools I found on a yardsale a couple of seasons ago. ( I knew it would come in handy someday)
 
 
I had to visit Hancock's for the bow & striped pants. Found this on the $ 3.98 pile & only needed  a little. The pants will be pajamas after halloween.


The hat was found on a yard-sale for $2.00. I only needed the hat for the frame or base for my hat.
I used some of the lace for the rim & made a black felt (covered with lace)  top section to go over the frame.
 
 I attached the top felt section to the hat & added a pink silk band to match the rim. I added kebab sticks with beads, peacock feathers & the "pricetag".


 And the final product, ready for tricks & treats. We had to tweak the make-up & used orange hairspray on her blond hair.
 
 
Satisfied!
 

Sunday, March 23, 2014

American Girl Clothes - Leotard/Bathing suit

   American Girl Clothes - Leotrard/Bathing suit

I found spandex at Hancock's for $1.75 a yard and used some of it for my daughter's talent show as a headband & yoga-pant waist. The rest just waited to be put to good use.
She had friend over and they begged me to make them some clothes for their 8" dolls, they saw the fabric and decided on bathing suits. I had left-over black lycra and made little cover skirts to match, then felt inspired and used an old t-shirt to make 2 more skirts. Now that I've made this, the tutorial will follow.


This is another t-shirt that will become a doll skirt like the leopard-print one.


Wednesday, March 12, 2014

Another Baby Quilt Ball - Easier design

I tried another technique to cut the design. I found this one much easier and had a finished product within a couple of hours. This one will be available on Etsy


I used a bowl as template for the circle, and cut the circle out.
Fold the circle in half an then in quarters.
Cut on the lines. Place the round edge of one 1/4 on the other facing to the corner to create your oval. Trace & cut the oval.
You have a 1/4 circle & oval template now.
Use this to cut 24 1/4 circles & 12 ovals.
Sew oval to round edge of 1/4 with 1/4" seam allowance. Start 1/4" from edge and end 1/4" from edge.
Sew another 1/4 circle to other side of oval, starting where the previous stitching ended.
Stich the straight sides together leaving a gap to turn inside out & stuff.
Cut the corners and turn over.
Fill with stuffing. ( I used pillow stuffing from a new pillow I bought).
Sew the gaps shut & attach the pieces one by one.
Have fun!!!!


Thursday, March 6, 2014

Baby Quilt Ball

Baby Quilt Ball

My, now 9 year-old received one of these when she was a baby and now that I have a grandbaby, I wanted to make one for her. She loved to play with it and it is easy to grip and hold onto. This is one of the 2 patterns or designs I tried I will post the next one when it is finished for comparison.
 
 
I used 4 different design fabrics, it would have been easier to use just 2 but I love colour.
 
 
 You will need 12 half circles (4" diameter) & 12 ovals that is cut to the same curve as the half circle.


 Cut a 1/4" slit in the middle of the half circle for where your oval point will turn.
 
Sew one side of oval to circle edge, lift needle & sew the other side of the oval to the other half using 1/4" seam.
 
 
 Turn them inside-out and fold the edge over. I bought a $2.99 pillow to use the stuffing. Stuff them as full as you can and pin the edges together 1/2" from the edge. This will make it easy to sew if the stuffing is not in the way.


 Sew your open edge closed as close to the edge as possible, double stitching at the ends.
 
 
 Gather all the points together by using a needle & thread. Pull them all close so you can group them in 4 petal flowers. Sew the points tightly together as shown on 4 sides of the ball. You can use embroidery thread to finish it nicely or leave it plain with your stitches hidden.
 

Monday, February 17, 2014

Shoebox Storage

A new craze hit our house. "Rainbow Loom" and all the little bracelets & charms that are being made. After hours of fun creating charms & designing her own charms, I finally decided to help in keeping it all together. My youngest now has her 1st You-tube video, this may be the start of something new for us as she is also a creative little soul.
I include the link to her video.
Back to the point, I had to help her keep it all together. Easiest I could find at that stage was a shoebox. But the box was used so often and anywhere she could find place to loom. I had to beautify the box. Here follows my Shoebox upcycle:


Ugly shoebox used for Rainbow loom bands, charms, bracelets & loom accessories

 
 Old dress, I used the fabric of. I left the buttons on the and used it for the lid.
 
 
I covered the sides with plain blue fabric and used a glue gun to attach the dress front to the top. The top was cut 1/2" bigger all around and I sewed a hem all around before gluing it to the lid.
 

Another piece of the blue for the side and I cut some flowers out of the dress and glued them to the side panel.
The other 3 sides were done by cutting a strip and folding the edges in and gluing it to the box. After this was attached, I simply folded the seams in toward the center of the box base (almost like wrapping a present) and glued it in place. Same with the top edges of the box, I had to cut the corners to get it flush when I folded it over.

 Al in all a very easy project and now I don't mind the boxes traveling from room to room. I had another box laying around covered that too.